Introduction
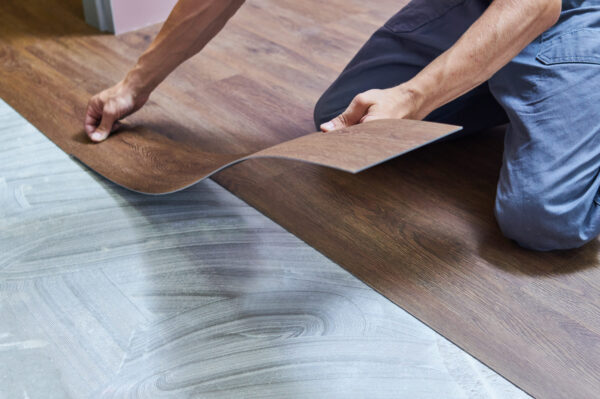
Vinyl flooring, a resilient and visually appealing option, has garnered popularity among homeowners. An essential aspect of maximizing its longevity and maintaining its aesthetic appeal lies in the precision of its installation. This comprehensive guide aims to walk you through the intricate steps of installing vinyl flooring, providing a roadmap to ensure a seamless and professional outcome.
Understanding Vinyl Flooring
Types of Vinyl Flooring
Vinyl flooring, available in diverse forms such as planks, tiles, and sheets, presents a spectrum of options catering to varied preferences and requirements. The versatility of vinyl empowers homeowners to choose the most fitting style for their spaces, whether seeking the warm aesthetics of vinyl planks or the geometric precision of vinyl tiles.
Pros and Cons
Delving deeper, let’s explore the nuanced advantages and considerations associated with vinyl flooring. While its resilience against moisture and affordability stand as major advantages, it’s equally important to weigh potential drawbacks, such as susceptibility to scratches. This balanced understanding serves as a foundation for informed decision-making.
Selecting the Right Type
Choosing the most suitable type of vinyl flooring involves a thoughtful analysis of factors like room usage, traffic levels, and personal aesthetic preferences. By navigating through these considerations, homeowners can align their choices with the specific needs of their spaces, ensuring a harmonious and enduring installation.
Pre-Installation Preparation
Gathering Necessary Tools and Materials
Beyond the basics of a utility knife and tape measure, a detailed checklist of tools and materials streamlines the installation process. This includes specialized adhesives, underlayment, and spacers. Equipping yourself adequately contributes to the efficiency and precision of the installation.
Measuring the Space Accurately
Precision starts with accurate measurements. A meticulous approach to measuring the installation space, factoring in any irregularities or unique features, sets the stage for a flawless execution. Consideration of these details minimizes waste and contributes to an efficient use of materials.
Checking and Preparing the Subfloor
The subfloor, often overlooked, plays a pivotal role in the stability and longevity of vinyl flooring. A thorough cleaning to remove debris and imperfections, coupled with addressing issues like moisture, ensures a pristine canvas for the installation. Leveling the subfloor creates the ideal foundation for a seamless and durable finish.
Step-by-Step Installation Guide
A. Subfloor Preparation
Moving into the installation process, subfloor preparation takes center stage. Clearing the space, addressing any imperfections, and ensuring a level surface are critical steps. The subfloor’s condition directly influences the final outcome, emphasizing the importance of this initial phase.
B. Acclimating the Vinyl
Acclimating the vinyl to its environment serves as a precautionary measure against post-installation issues. Allowing the material to sit in the installation space for at least 48 hours minimizes the risk of expansion or contraction, providing a stable foundation for the subsequent steps.
C. Cutting and Fitting
Precision during the cutting and fitting phase is paramount. A sharp utility knife, precise measurements, and careful attention to detail ensure a snug fit of planks or tiles. Intricate areas, such as corners and around obstacles, demand a meticulous approach for a visually appealing and professional result.
D. Installation Techniques
The chosen installation technique, whether a click-and-lock system or adhesive application, requires adherence to manufacturer instructions. Taking the time to align planks or tiles precisely ensures a seamless connection, contributing to the overall integrity and durability of the floor.
E. Dealing with Doorways and Transitions
Seamless transitions between rooms and doorways require a strategic approach. Techniques such as undercutting door casings and utilizing transition strips are integral to achieving a polished and cohesive look. Attention to these details elevates the overall aesthetic appeal of the installed vinyl flooring.
F. Finishing Touches
Completing the installation involves the installation of baseboards and trim. These finishing touches serve both aesthetic and functional purposes, enhancing the overall visual appeal and concealing expansion gaps. A meticulous approach to these final details contributes to a polished and professional appearance.
Troubleshooting and Common Mistakes
Even with careful planning, installation challenges may arise. Understanding common issues, such as adhesive mishaps or misaligned planks, empowers homeowners to address challenges promptly. Proactive troubleshooting ensures a smooth progression through the installation process.
Advantages of Professional Installation
While the allure of a DIY project is undeniable, certain circumstances may warrant professional installation. Assessing the complexity of the installation and considering personal comfort levels with the process will guide homeowners in making an informed decision. Exploring the costs and benefits of professional installation provides a comprehensive perspective.
Conclusion
In conclusion, mastering the art of vinyl flooring installation is a multifaceted endeavor that demands attention to detail and careful planning. This step-by-step guide, when followed diligently, equips homeowners with the knowledge and skills needed for a successful DIY project. Remember, a well-installed vinyl floor not only enhances the beauty of your space but also adds a durable and practical flooring solution to your home. Happy installing!
